Wednesday, April 20, 2011

Spiced Fish Cakes

from sea to table
Okay, I know it has been weeks since I have posted anything on m blog. I think it has to do with all this beautiful sun we are currently having. I have a slew of great recipes to post in the coming days.

catch of the day Cod

Living so close to the sea has so many advantages and I know that I am so grateful that at anytime I can go out and get myself a lovely catch of the day and whip something up like  fish cakes. Oh, they sound like a lot of work and expense but, really these are fun to make and they taste fantastic. Match them up with a great salad for a light lunch, or serve with a spicy chutney and serve as an starter at your next get together. These would be perfect for good Friday and those celebrating Easter and having a lot of mouths to feed these will be a huge hit.

Spiced Fish Cakes adapted from Anjum's New Indian


These cakes are full of flavor, light and not too spicy. These cakes work well with many types of fish and Anjum suggests trying salmon or even trout. I so on that train. Any white thick flesh fish would work here. try serving with a great spicy chutney or a nice coriander cucumber taziki.

Makes 12-16 small cocktail cakes

5 cloves
2 cm piece of cinnamon
1½ teaspoon cumin seeds
browning onions
5 tbsp vegetable oil
1 small/medium onion, peeled and chopped-diced'
5 large cloves of garlic,peeled and chopped
1 tbsp chopped ginger
salt, to taste
½-1/3 tsp red chili powder
1 tsp garam masala
1½-2 tsp dried mango powder (available at www.kryddlandet.se) or Asian food markets
450g of fish fillets, such as cod, haddock, salmon,trout
15 g fresh coriander leaves and stalks, chopped
1 large egg,beaten
60-70g fresh breadcrumbs(about 2 large slices, to bind

Grind together the cloves, cinnamon and cumin seeds to a fine powder (I use my coffee grinder)
Heat 2 tablespoons of oil in a small non-stick frying pan and fry the onions. I always fry my onions on a medium heat to get them nice and browned.You want them to cook slowly to get that deep color and flavor, but not to burn them.Add the garlic and the ginger and cook, stirring, over a low heat, for a minute.Add the salt and all the spices; cook for another half minute or so.

flake with a fork
Meanwhile cook the fish in a pan in just enough water to cover and cook until they are just opaque- this takes 2-4 minutes depending on the thickness of your fish. Drain in a strainer and then add to a large mixing bowl and flake into pieces.

Mix together the spiced onion mixture, fish and coriander. Taste and adjust the chilli, salt and dried mango powder (for tartness). Stir in the egg and then the breadcrumbs to bind. Use as much as you need for soft cakes that will hold their shape. Form into small, flat cakes.

Heat half of the remaining oil in a large non-stick pan. Add half the cakes and fry over a lowish heat until both sides have browned, around 2 minutes per side. Repeat and drain on paper towel. Serve hot, with salad or as a starter. They will fill you with happiness.

Monday, April 4, 2011

Maple Sugar And Black Cardamom Cinnamon Rolls With Light Mucovado Brown Sugar

Good Morning Sunday
There is nothing more comforting then hearing your child ask you to go bake in the kitchen with them. Like most 5 year olds Lilla A loves Swedish Bullar. I  undoubtedly love American style cinnamon rolls. We have to compromise in this household, and this is what I have come up with. It's a labor of love, and a pretty darn crossbreed if I do say so myself.

A traditional Swedish Bullar is a sweet dough that  is based on the standard dough recipe. Add yeast to sugar-milk, add in flour, sugar, eggs, knead and let rise. Roll out add the toppings which is usually margarine blended with cinnamon and white sugar. Spread on the rolled out dough and rolled, sliced and egg washed and topped with pearl sugar. Mine is not so different, but it is tweaked to add a little pizazz to them.

grind your own cardamom
 In baking do not be afraid to grind your own spices. These are whole black cardamom seeds. If you got yourself a coffee grinder, do give it a try with these. The smell is fantastic. You could also use a mortar and pestle. Give yourself the pleasure of sharing these at your next breakfast table or afternoon tea. I am sure you will agree they will give you  great comfort.

Maple Sugar And Black Cardamom Cinnamon Rolls


recipe as follows:
3-4 teaspoons of whole black cardamom ground. (will equal about 1½ teaspoon of ground ) or just add in already ground.

50g of fresh sweet yeast or 3½ tablespoons of dry yeast
1 cup warm milk
1/3 cup white sugar
½ cup melted coconut oil or you can use butter
1 tsp salt
2 eggs
mmm goodness....
4 cups of flour or more to make a smooth dough

How to filling:

½ cup to 3/4 cup soft butter
½ cup-3/4 cup soft light brown sugar
2-3 tablespoons of good quality cinnamon


  1. Dissolve yeast in warm milk
  2. Add the rest off ingredients and mix well(.Remember to add in your ground cardamom to the dough) Knead into a ball.
  3. Let rise until double in size(about one hour)
  4. When ready, roll out into about 1/4 inch thick square-rectangle 
  5. Spread softened butter on the rolled out dough 
  6. Then sprinkle your cinnamon covering all the edges
  7. Sprinkle on the light brown sugar and fan out so it is evenly covered 
  8. Roll up your dough. be sure to make it quite tight and uniform so you can get equal slices
  9. rolled and ready to slice
    Preheat oven to 400 degrees F or 200 degrees C and line your baking trays-cookie sheets with lovely little wide size muffin liners.¨
  10. Slice in to 3/4 inch or less give or take and let rise in a warm spot for about one hour.
  11. After they have rises for the second time lightly beat an egg and gently egg wash the tops of your BULLAR/ Cinnamon rolls and sprinkle with if you can find Swedish pearl sugar(maybe at Ikea stores or the internet) or I used Real Canadian Maple sugar granulated sugar  available at www.erablierecarber.com  which just added the most amazing taste and texture.
so nice
You need to bake these for about 8-10 minutes. Watch closely. The maple sugar melts and can burn easily.

Remove from the oven and let cool on a baking rack. Serve warm or these freeze very well. Just reheat in the oven for 5 minutes. I hope you enjoy them. Have a great spring day; where ever you are. Thanks for dropping by and hope to see you again.

Thursday, March 31, 2011

Creamy North Indian Fish Curry via Anjjum's New Indian

I used fresh Scandinavian Cod 
The other day. I got a fix. It really is like any other form of addiction. My new cookbook arrived.
  Anjum's New Indian by Anjum Anand.   Is just what I needed. A real challenge in the kitchen. A chance to track down hard to find spices, and to really make something authentically Indian. We love Indian food. We try to get out a couple of times a year to our favorite restaurant in Göteborg, but now that I have my new cookbook. I can cook all year round. I ordered most of my spices from the internet and for my Swedish readers you can go to www.kryddlandet.se or your local Indian supermarket to find many of the essential spices you will need to cook Indian food.

I enjoyed this cookbook very much. For the beginner  Indian food cook this is a great cookbook to introduce into your library. Anjjum makes her recipes easy to read, with well thought out cooking directions. I find her books to be really tailored to the "at home cook". It is a lovely book filled with great stories of her personal cooking journey through friends, and family. I have to admit, you need to have time to cook Indian food. It is that time that makes all the difference.Go out and pick yourself up a copy. You will not be disappointed.

CREAMY NORTH INDIAN FISH CURRY
Serves 4-6

5 tbsp vegetable oil
4 cloves
 2 black cardamom pods
5cm piece of cinnamon stick
1 small-medium onion,peeled and chopped
5 large cloves of garlic, peeled
10 g fresh ginger, peeled'1-2 green chillies, left whole but pricked with the tip of a knife
½ tsp turmeric
everything pre-measured-prepared
frying the whole spices
1 rounded tsp ground cumin plus ½ tsp red chili powder, or to taste
1 rounded tsp ground coriander
1½ tsp garam masala
½ tsp freshly ground black pepper
salt to taste
4 medium tomatoes, pureed
50 g cashew  nuts, made into a paste with some water
500g fresh steaks or fillets cut into chunks
handful fresh coriander,leaves and stalks, chopped

NOTE: I pureed the tomatoes first and set aside, as well I pureed the garlic and the ginger paste and the cashew paste, before starting the cooking process. It makes it much easier to pre-measure everything as Indian cooking is a lot of steps.

Heat oil in a large non stick saucepan. Add the whole spices and fry for 20 seconds.Add the onion and cook until golden. Meanwhile, using your handheld blender, make a paste of the garlic and ginger with about 50ml of water. Add this to the pan with the green chilies and cook until the oil comes out, around 4-5 minutes, stirring as it gets thicker.

reducing the water and mixture
Add the powdered spices and salt and stir to incorporate. Add the tomatoes and 100ml water and cook over a medium-high heat until all the water has dried off. Then lower the heat and cook gently, covered, until the masala releases oil, around 6-8 minutes.Stir often as it get's thicker. Your house will smell delicious.

cod steaks, leave the bones in for more flavor
Add the cashew paste and stir fry for 2-3 minutes.Add 300ml water, and bring to the boil and simmer, covered for 15 minutes. Taste, the curry it should be well rounded in flavor. Add more hot water for a creamy consistency. Taste again and adjust the seasoning if you want. Add the fish and coriander and cook until just done, around 3-4 minutes.( I used quite large cod steaks so it took much longer to cook, about 20-25 minutes) Shake the pan instead of stirring as to not break up the fish. Serve with a great pilaf or steamed basmatti rice. We had spiced mixed pickle and lime pickle on the side. A chutney would be lovely as well. It was a huge hit in our home. I hope you do not get overwhelmed with the amount of ingredients and time-methods it takes. I assure you, this is better than any take out.
very good indeed. Two thumbs up

Saturday, March 26, 2011

My Big Fat Chocolate Chip Cookies

Got Milk?
I have a theory. When bored do bake. It is amazing what you can come up with in the late hours of a friday night. I am trying to add as many posts as I can for all my readers, and perhaps I have been a little heavy on the chocolate posts, but really. Who can ever have enough chocolate? I am grateful to my kind friends and neighbors who let me supply them with all my baking goodies. It is so comforting to have the opportunity to be able to share my passion of baking with all of you. I am a newbie at this blogging thing, so please bare with me and I hope that I can continue to inspire other's and to learn. 

How to Chocolate Chip Cookie:
oh my goodness!


2 cups all purpose flour
½ teaspoon baking soda
½ teaspoon salt
3/4 cups unsalted butter
1 cup packed brown sugar ( I used light muscovado brown sugar)
1 cup white sugar
1 tablespoon vanilla extract
1 egg
1 egg yolk
2 cups of semi sweet chocolate chips or 300 g of a good baking chocolate chopped.


  1. Preheat your oven 180 degrees C or 360 degrees F
  2. Line your baking trays with parchment paper
  3. Sift together, flour, salt,baking soda; set aside
  4. Melt butter 
  5. In a medium bowl, cream together the melted butter, brown sugar and white sugar until well mixed
  6. Mix in the vanilla
  7. Beat in the egg, egg yolk, until light and creamy
  8. Mix in the sifted ingredients until just blended
  9. Stir in the chocolate chips. I usually use a wooden spoon or my hands, but try not to over work the dough. Just enough to fully incorporate. 
  10. Drop cookie dough onto the prepared cookie sheets. I used 1/8 cup which  gave me large cookies. 

makes about 25 cookies or 15 very large ones
Cookies should be 3 inches apart. Bake for 15 minutes or until done to your likeness. I like mine a little under cooked, so I took them out at 15 minutes, but if you like a crunchy cookie bake for 18 minutes.The edges should be lightly golden, but not overly dark. Cool on the baking sheets for 5 minutes before transferring to a cooling rack. Let them completely cool before storing in an air tight container. They freeze well....If they last that long.

Thursday, March 24, 2011

Boston Cream Pie Cupcakes

oh, I forgot to mention chocolate!
It's a beautiful, yet very windy spring day here in Sweden. It seems as if we might be over this hard winter. I have been super busy in the kitchen baking up my attempt at Boston Pie Cream cupcakes. I had a lovely friend over today for lunch with lilla A's good pal J.It has been a hard time for my friend, as her niece is recovering well after a horrific car accident that has shocked our little village, and surrounding towns. It was nice to have her here to just say, it's okay to get back to normal and continue to live life as we did before the accident. As hard as it is to do. We need  friends and family even more during tough times and perhaps a little chocolate can't hurt either.

Adapted from Martha Stewart

beating the eggs and sugar until thick and airy
1½ cups all purpose flour, plus more for tins
1½ teaspoons baking powder
½ teaspoons salt
½ cup whole milk
3 ounces or 6 tablespoons unsalted butter, softened, plus more for tins
3 large eggs
1 cup sugar
 1 teaspoon vanilla extract


buttered and floured tins
perfect! so light and airy cupcakes

  1. preheat oven to 180 degrees C or 350 degrees F
  2. butter and then flour a standard muffin tin
  3. whisk together flour,baking powder,salt in a small bowl
  4. warm milk and butter in a small sauce pan over low heat
  5. beat eggs and sugar in a mixer or hand held mixer and beat for 5 minutes until thick and creamy
  6. beat in flour, salt and baking powder mixture
  7. bring milk and butter to a boil and add to the egg/flour mixture and with your mixer blend until smooth
  8. Add vanilla and mix but do not over beat. Just until blended. Fill the muffin tins half full
  9. Bake for 15 minutes or until golden and let sit in muffin tin for at least 10 minutes before removing from the tin.
Let cool completely before slicing.

How to Vanilla Cream:

2 large egg yolks
1/4 cup sugar
2 tablespoons cornstarch
1 cup whole milk
½ teaspoon pure vanilla extract
Whisk your egg yolks in an medium size bowl. Set to the side.

nice and thick
In a small saucepan add your cornstarch,sugar and slowly mix in your whole milk. Bring to a slight boil over medium heat and pour about 1/3 of a cup of the heated mixture into your well beaten egg yolks.Stir until incorporated and add back into the rest of the milk mixture. Continue to stir over medium heat until thickened about 5 minutes. Add in your vanilla extract. Pour into a clean bowl and cover the surface with plastic wrap and place in the fridge to cool for about one hour. 

How to Chocolate Ganache Glaze

2/3 cups heavy cream
6 ounces semi sweet chocolate finely chopped
1 tablespoon light corn syrup

ganache is......mumsigt!
In a small sauce pan over medium heat. Add your chopped chocolate to a heat proof bowl and when the cream has come to a boil pour over the chocolate and stir until well incorporated. Add in your corn syrup and let sit for at least 15 minutes before using. I found that it was very runny after the first 5 minutes, as the original recipe called for. The original recipe says to serve immediately, but I had no problem making these and serving them later in the day. They are nice anytime. So if your having a hard day or your feeling a little down
these might just pick you right up. Have a nice spring day and thanks for dropping by.

How to assemble cup cakes is really like making a sandwich. Take a serrated knife and slice in half. Add a teaspoon or more vanilla cream to one half of the muffin. Place the top on top, and cover with chocolate. I did it on individual plates to make service easier. It was a great show stopper. I would think using a baking rack over a cookie sheet would make for less clean up.Have fun. Finger licking good. Thanks KFC* !:)
very fun to make


Sunday, March 20, 2011

Praying to Darwin get's her Bran Muffins

You either love'm or not.
Bran is our friend, but bran also scares the be- jeepers out of people.Who knew that a little muffin packed with fiber would harvest such sour puss reactions. Last week I received a email from a  childhood friend of mine.Miss G.She as well has spent a few years trolling it out in the same middle of nowhere Canada, and she writes about it on her ever so clever and very entertaining blog www.prayingtodarwin.wordpress.com

Everyone back home in Canada probably has a horror story that involves a visit to some little diner or coffee shop that includes the dreaded Bran Muffin. The hockey puck , the chalk cough muffin, chewing on sawdust as they have been referred too.

 I have always loved a good moist bran muffin. The texture, the sweetness from the raisins and the real wholesomeness that I get when stuffing my face with a dozen or so when freshly baked.

(For my Swedish readers bran is (Vete kli) available in all large grocery stores.)

Miss G. May this help keep you "Regular" hahaha:)

Note:
For those who also support your local organic markets. This muffin can be almost 100% made from organic material. I used all organic ingredients accept for the corn oil. baking powder and baking soda.Great to know that it is becoming more accessible in our markets!

Toasted bran with pureed sultana's and golden raisins
Adapted from Pastries from La Brea Bakery by Nancy Silverton

Preheat your oven to 180 degrees C 350 degrees F
Makes 12 muffins
2 cups (125)g wheat bran
1 cup,plus ½ cup (190g total) sultana's
1 cup plus ½ cup (370ml total) water
½ cup buttermilk or plain low  fat not "light" yogurt .( I used filmjölk http://en.wikipedia.org/wiki/Filmj%C3%B6lk read all about it in English)
1 teaspoon of grated orange peel ( I used blood orange)
½ cup (105g) packed light brown muscovado sugar
½ cup (125ml) corn oil
1 large egg
1 large egg white
½ cup (65g) white flour
1/4 cup (35g) whole wheat flour
1 teaspoon baking powder
1 teaspoon baking soda
½ teaspoon sea salt
½ cup (65g) golden raisins


Mounded slightly to help give lift when baking

  1. Line a 12 cup muffin tin with paper liners
  2. Scatter the wheat bran on a baking sheet with sides and toast in your preheated oven for six to eight minutes stirring the bran a few times so it can cook evenly.Let cool
  3. While the bran is toasting, heat 1 cup of  sultana's with ½ cup of water and simmer for ten minutes or until the water is absorbed.Puree the sultana's in a food processor hand blender until smooth.
  4. In a large bowl,mix together the toasted cooled bran, buttermilk or yogurt,1 cup water, then mix in the sultana puree, orange zest and light brown mucovado sugar.
  5. Stir in the corn oil, egg and egg white
  6. Mix together the flours, baking soda and salt and sift directly into the wet ingredients. Stir until the ingredients are just combined( we want to retain as much air as possible in these muffins, so be careful to not over stir) mix in the whole sultana's and golden raisins. Just a couple of stirs....
  7. Spoon the batter into your lined muffin tins, make sure the batter is mounded slightly in each one.muffin tins can vary in size, if your using a bigger muffin tin then make fewer muffins.
Bake for 25-30 minutes, or until the muffins feel set in the center

These beauties are super moist and full of flavor. Great texture and a lovely way to start your day.

Thursday, March 17, 2011

Homemade Nutty Nutella


pure 
heavenliness

Okay, did you also miss World Nutella Day on February 5th, 2011 ?
www.nutelladay.com
Today is a festive day as well. Happy St. Patrick's day everyone. I know, I should of  posted some sort of green fried tomatoes recipe or grasshopper pie.(Not literally) but, I do think you can be green with envy over my homemade nutella.  I am quite impressed with how this turned out. It tastes just like the store bought, and I got at least three cups for less than what one  large jar costs. Given, if you have the chocolate already.

I buy Choco Vic Spanish Ceylon Milk Chocolate with 36% Coco   
I am all about the quality of baking and cooking chocolate available  www.mumsigt.se and I have been looking forward to trying out my newest CEYLON  milk chocolate. It is never easy to say no to an interesting recipe for me. I  can admit that I am a  recipe junkie and cookbooks are like crack for me.There are a couple of points that I first should mention.

creamed almonds and hazelnuts

  1. You need to have a great food processor 
  2. Have more than you think you will need storage jars 

Okay, lets talk nuts. Hazelnuts I hear are sometimes hard to come by in some countries. Lucky here in Sweden they are quite available and not overly expensive. If you live in a country where hazelnuts are hard to find at your local store. Do try to find an Arabic or Indian,Latin  market as they will most likely have a selection available there for you.

I came across this recipe as I was researching what to do with a lot of mushrooms, (no that would be gross.) chocolate nutella mushrooms...ew.... BUT... I came across this recipe from reading many others success of making their own Nutella recipes and decided I needed to give it a try.

Adapted from the Encyclopedie du Chocolat by Frederic Bau


 40g peeled whole sweet almonds(if you can find them) other wise you will have to roast and peel them as you do with the hazelnuts.( i didn't roast my almonds)
160g hazelnuts 
400g whole milk
60g powdered whole milk or fullest fat powdered milk you can find
3 tablespoons mild flavored honey
pinch of sea salt
6 ounces 170g bittersweet or semisweet chocolate,chopped
5 ounces 140g milk chocolate chopped. Use a milk chocolate with at least 30% cacao solids works best here.

right out of the oven before I removed the shells

  1. preheat your oven to 180 d C or 350 F
  2. spread out your nuts on two separate baking pans you need to roast them separately if not using pre-peeled almonds. You need to toss them round the pan a few times to help get them completely roasted.Let them roast for about 10-12 minutes. watch them closely as they can burn.
  3. meanwhile, have your clean tea towels set out on a clean surface
  4. add your roasted nuts to your towel and wrap up tightly and rub until you can loosen as many skins as possible.It doesn't have to be perfect, but do try to get as many off as you can. Add all nuts to your mix master.
  5. Next warm your milk, milk powder, honey, salt on medium heat until it reaches a boil and remove from heat.
  6. On your highest setting on your mixer.Blitz them until you can get a fine paste like consistency. I let mine mix for at least 3-4 minutes.
  7. add the warmed milk and let sit while you melt the chocolate over a pan of simmering water.
when chocolate is melted add it to the milk/nut mixture and mix until incorporated.
lovely
Do not be overly concerned if your Nutella is runny and there is a fine grind of nuts still in the mixture. You can always strain it in an ultra fine strainer, but I kind of like the small bits. Take your clean jars and pour in the lovely Nutella and let it sit covered in the fridge for at least 4 hours. I let it sit over night.

NUTELLA
Pure comfort in a jar. Eat within one week, and do enjoy the process of cooking. It is half the fun.Happy St. Patrick's day and remember  friends do not let friends drive drunk. Be safe to all who will be out chasing the pot of gold.

Tuesday, March 15, 2011

Lick The Spoon And Bowl Syndrome Chocolate Devil Food Cake


Happy,happy,joy,joy....
Growing up in the prairies of Canada was the foundation of many of the talents and traits that have made me who I am. I learned to live among a diverse group of people, become socially aware of my surroundings. Be street safe and have the chance to lap up delicious baked goods from the womens WW1, Royal Purple and Sunday school ladies.
Devil food cake has been a main stay in both Canadian, and American homes forever I am sure. There has been many a family group gatherings and a slice of this has been passed around. I know many of my friends mom's/ grandma's had this sitting on there farm kitchen tables at least a few times a season.
Chocolate cake is comfort food. It gives you the pleasure of  coming close to that wholesomeness that  some of us had with our mom's and grannies in the kitchen growing up.
"The lick the spoon and bowl syndrome," I call it. Some kind of smell or taste that transports you back to your childhood, when everything in life was happy and good. This cake does it for me. It takes me back to comfort.
some of your kitchen's finest

Two things made my day. First My little blog was visited by the king of blog. Mr. David Lebovitz.   I am so thrilled to have been visited. It is a great pleasure to know that maybe one day I will have the skill and the knowledge to be able to guide other "newbies" to food blogging. At first when I read his post about what you should/shouldn't do in food blogging it scared the crap out of me. My anxiety was rushing to my stomach, and I kind of thought to myself how the heck am I going to get all this? My pea sized brain needs to remember to incorporate it into my blog, but  needless to say I have a lot to learn, so bare with me and I know my photography, grammatic, editing,  bites the big one. I will get better....hopefully.

This recipe is adapted from David Lebovitz www.davidlebovitz.com


Devil Food Cake 
traditional creamed butter/sugar, wet and dry ingredients


For the Cake:
9 tablespoons unsweetened coca powder
1½ cups cake flour (not self rising) 
½ teaspoon salt
1 teaspoon baking soda
1/4 teaspoon baking powder
4 ounces 1 stick unsalted butter, at room temperature
1½ cups granulated sugar
2 large eggs, at room temperature
½ cup strong coffee
½ cup whole or low fat milk


For the Ganache frosting:

10 ounces of bittersweet or semisweet chocolate, coarsely chopped
½ cup water or heavy cream ( I used water, as this cake is rich in itself)
3/4 cup 1½ sticks unsalted butter

1.Preheat oven to 185 degrees C-350 F
2.Butter 2  9"X 2" cake pans and line the bottoms with circles of baking paper¨
3.To make the cake layers, sift together the coca powder,cake flour salt,baking soda,and baking powder in a bowl.
4.In the bowl of a standing electric mixer or by hand, beat together the butter and the sugar about 5 minuted until smooth and creamy. Add the eggs one at a time until fully incorporated.I used my hand mixer.) Remember to scrape down the sides of your bowl as you mix.
vintage pyrex* from my mom
5.Mix together the milk and the coffee. Stir half of the dry into the the butter mixture, then add the coffee and milk. Finally stir in the other half of the dry ingredients.

6. Divide the batter into your prepared cake pans, and bake for 30 minutes, or until a toothpick inserted into the center comes out clean. One cake was done quicker than the other, so keep an eye on it.Cool completely before frosting.
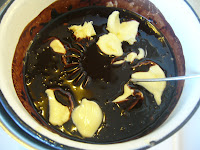
water bath
7.To make the frosting, melt the chopped chocolate with the water stirring occasionally until melted.Remove the bowl from the pan of water.

8. Cut the butter into small pieces and whisk them into chocolate until they are completely melted and the ganache is smooth. Cool until spreadable, which might take up to an hour at room temperature. I let it rest for an hour than popped it into the fridge for 10 minutes and it was ready to use.

9. To frost the cake:
Run a knife around the inside of  each the cakes which will help release them from the pans. Carefully lay them onto a cooling rack and remove the baking paper. Once completely cooled you can invert one cake onto your
chosen platter and begin to spread your frosting over the entire top of cake. Making sure you save enough to fully cover your cake as a whole. Place the second cake on top of the frosted bottom and continue to ice as you desire. Let rest for a few minutes or you can place it into the fridge but remove at least 30 minutes before you want to serve. We ate it just as it was. fresh, still a little warm, but oh so perfect. 
The second best thing was sharing it with Anette and her family, friends for her 40th birthday!
Happy birthday Anette!!


Monday, March 14, 2011

Four Lost Souls Amaretto Pecan Pie

shine bright 
Lately it seems that pretty much everyone I know is dealing with a death of someone dearly. It has been a long, cold and icy winter, and now mother nature has claimed three now four(as of yesterday) lovely souls. We live in a very tiny community of only 1900 inhabitants, but this tragic loss has reached further than our little village. I am so great full to announce that there was on life saved and we wish her a speedy recovery, and us her little community will be there to help hold her up and to hold the hands and wipe the tears of those who lost a loved one on that icy night.

Perhaps they are not the stars, but rather openings in heaven where the love of our lost ones pours through and shines down upon us to let us know they are happy. -Author Unknown.


I am one of those people who needs to be in the kitchen when tragic events happen. It is my solace and my forgiver. I hope that perhaps there are other's out there that feel the same, and maybe this recipe will drive away or give you some sort of peace. I know it made me feel better.
Let's start with the pie crust. It is my favorite part to eat, and it is the foundation to any great pie. I really like pie crusts made with butter, instead of shortening or margarine. I think it gives a flavor and the crumb it develops is so flaky and it bakes wonderfully. Here is my all time favorite pie crust recipe.

How to basic pie crust.(Enough for two single filled pies or one covered pie)

2 1/2 cups all-purpose flour, plus additional for rolling
1 1/4 teaspoons kosher salt
250 grams unsalted butter, cut into pieces and chilled.
about 3-5 tablespoons of ice cold water

The secret to a great pie crust that bakes into a wonderfully flaky, crispy crust. Is not to over work the dough. It is not difficult to make an amazing dough, just be aware that the more you "man handle" the mixture the tougher the dough will be. I always use my mix master and add the flour and salt blitz or a second then add the butter and blitz until it starts to form a pea like dough. Usually just a few seconds then add the water tablespoon by tablespoon until it reaches a ball like stage, but not over sticky, but just easy enough to remove to my counter. You can always do it by hand with a couple of forks or with a pastry blender. It literally takes 2-4 minutes and it is ready to be flattened into disks and wrapped in plastic and set into a cold fridge for 1 hour to rest.
If doing it by hand combine the flour and salt in a large bowl, then add the butter and combine gently. With your hands or a pastry blender, work the butter into the flour. Tossing and incorporating any loose pieces. Do this until the butter pieces are no longer bigger than a pea. Drizzle the water a tablespoon at a time until the dough just holds together when pinched.Add more water if your dough seems dry. Work in, but do not over knead it. Divide the dough into two half's one bigger than the other. The bigger one will be for the bottom.( I used the other half to decorate the top of my pie.)
mmmm...pie...
Let it rest in the fridge for 1 hour before use. If it is too hard to roll let it rest on the counter for 15 minutes at room temperature . Lightly flour your work space and and rolling pin.Lightly flour your disk of dough and roll out until 1/8 thick and roll up your dough around your rolling pin and roll over your pie plate. Makes it much easier to handle. Return to the fridge for 15 minutes to let the gluten rest. If you omit this stage your dough will shrink when baking.

rice, dried beans work well here.
When making a "open face" pie like pecan. You need to pre-bake your pie crust for at least 10-15 minutes at 180 degrees C. I have just ordered my new baking weights and they have not arrived yet, so I used rice instead( See photo.) Just line it with tin foil or baking paper first. Remove when it is looking a little golden brown, and gently remove the tin foil and rice.


How to Pecan Filling: 
:Pre heat your oven 180 degrees C 
1 cup dark brown sugar
2/3 cups golden syrup
1 tablespoon of *DISARONNO Italian Amaretto Liqueur or traditional rum or a dash more!
4 tablespoons butter
blending eggs, cream into syrup
3 large eggs
1/4 cup heavy cream
2 cups of pecans chopped ( I leave a few un- chopped to decorate the top).

Roast your pecans on a baking tray for 5 minutes at 180 degrees C. Remove from oven and let cool. Chop and set to the side.
the good stuff. :)
Next, in a large pan add the sugar and syrup Amaretto/rum,butter on high heat and stirring constantly bringing to a boil. Remove from heat and let cool until tepid. In a new bowl, whisk eggs. When the boiled syrup has cooled beat in the eggs, salt and cream.

I like to stain the mixture in-case of any extra egg parts
Add your chopped up roasted pecans to the bottom of your pre-baked pie shell and pour over your tepid syrup/egg mixture.I choose to decorate this particular pie for the the three new stars in the sky, but traditionally this pie is enough without any topping. Add to your preheated oven and bake for 45 minutes or until the middle is not springing back to much to the touch. Should have a firm top, but not jiggly. Let cool completely, before serving. Even better the next day. Serve with whipped cream, ice cream or it is fine just on it's own.

Star bright
star light
E. we are praying for a speedy recovery.
the first star I see tonight.......