Thursday, March 17, 2011

Homemade Nutty Nutella


pure 
heavenliness

Okay, did you also miss World Nutella Day on February 5th, 2011 ?
www.nutelladay.com
Today is a festive day as well. Happy St. Patrick's day everyone. I know, I should of  posted some sort of green fried tomatoes recipe or grasshopper pie.(Not literally) but, I do think you can be green with envy over my homemade nutella.  I am quite impressed with how this turned out. It tastes just like the store bought, and I got at least three cups for less than what one  large jar costs. Given, if you have the chocolate already.

I buy Choco Vic Spanish Ceylon Milk Chocolate with 36% Coco   
I am all about the quality of baking and cooking chocolate available  www.mumsigt.se and I have been looking forward to trying out my newest CEYLON  milk chocolate. It is never easy to say no to an interesting recipe for me. I  can admit that I am a  recipe junkie and cookbooks are like crack for me.There are a couple of points that I first should mention.

creamed almonds and hazelnuts

  1. You need to have a great food processor 
  2. Have more than you think you will need storage jars 

Okay, lets talk nuts. Hazelnuts I hear are sometimes hard to come by in some countries. Lucky here in Sweden they are quite available and not overly expensive. If you live in a country where hazelnuts are hard to find at your local store. Do try to find an Arabic or Indian,Latin  market as they will most likely have a selection available there for you.

I came across this recipe as I was researching what to do with a lot of mushrooms, (no that would be gross.) chocolate nutella mushrooms...ew.... BUT... I came across this recipe from reading many others success of making their own Nutella recipes and decided I needed to give it a try.

Adapted from the Encyclopedie du Chocolat by Frederic Bau


 40g peeled whole sweet almonds(if you can find them) other wise you will have to roast and peel them as you do with the hazelnuts.( i didn't roast my almonds)
160g hazelnuts 
400g whole milk
60g powdered whole milk or fullest fat powdered milk you can find
3 tablespoons mild flavored honey
pinch of sea salt
6 ounces 170g bittersweet or semisweet chocolate,chopped
5 ounces 140g milk chocolate chopped. Use a milk chocolate with at least 30% cacao solids works best here.

right out of the oven before I removed the shells

  1. preheat your oven to 180 d C or 350 F
  2. spread out your nuts on two separate baking pans you need to roast them separately if not using pre-peeled almonds. You need to toss them round the pan a few times to help get them completely roasted.Let them roast for about 10-12 minutes. watch them closely as they can burn.
  3. meanwhile, have your clean tea towels set out on a clean surface
  4. add your roasted nuts to your towel and wrap up tightly and rub until you can loosen as many skins as possible.It doesn't have to be perfect, but do try to get as many off as you can. Add all nuts to your mix master.
  5. Next warm your milk, milk powder, honey, salt on medium heat until it reaches a boil and remove from heat.
  6. On your highest setting on your mixer.Blitz them until you can get a fine paste like consistency. I let mine mix for at least 3-4 minutes.
  7. add the warmed milk and let sit while you melt the chocolate over a pan of simmering water.
when chocolate is melted add it to the milk/nut mixture and mix until incorporated.
lovely
Do not be overly concerned if your Nutella is runny and there is a fine grind of nuts still in the mixture. You can always strain it in an ultra fine strainer, but I kind of like the small bits. Take your clean jars and pour in the lovely Nutella and let it sit covered in the fridge for at least 4 hours. I let it sit over night.

NUTELLA
Pure comfort in a jar. Eat within one week, and do enjoy the process of cooking. It is half the fun.Happy St. Patrick's day and remember  friends do not let friends drive drunk. Be safe to all who will be out chasing the pot of gold.

Tuesday, March 15, 2011

Lick The Spoon And Bowl Syndrome Chocolate Devil Food Cake


Happy,happy,joy,joy....
Growing up in the prairies of Canada was the foundation of many of the talents and traits that have made me who I am. I learned to live among a diverse group of people, become socially aware of my surroundings. Be street safe and have the chance to lap up delicious baked goods from the womens WW1, Royal Purple and Sunday school ladies.
Devil food cake has been a main stay in both Canadian, and American homes forever I am sure. There has been many a family group gatherings and a slice of this has been passed around. I know many of my friends mom's/ grandma's had this sitting on there farm kitchen tables at least a few times a season.
Chocolate cake is comfort food. It gives you the pleasure of  coming close to that wholesomeness that  some of us had with our mom's and grannies in the kitchen growing up.
"The lick the spoon and bowl syndrome," I call it. Some kind of smell or taste that transports you back to your childhood, when everything in life was happy and good. This cake does it for me. It takes me back to comfort.
some of your kitchen's finest

Two things made my day. First My little blog was visited by the king of blog. Mr. David Lebovitz.   I am so thrilled to have been visited. It is a great pleasure to know that maybe one day I will have the skill and the knowledge to be able to guide other "newbies" to food blogging. At first when I read his post about what you should/shouldn't do in food blogging it scared the crap out of me. My anxiety was rushing to my stomach, and I kind of thought to myself how the heck am I going to get all this? My pea sized brain needs to remember to incorporate it into my blog, but  needless to say I have a lot to learn, so bare with me and I know my photography, grammatic, editing,  bites the big one. I will get better....hopefully.

This recipe is adapted from David Lebovitz www.davidlebovitz.com


Devil Food Cake 
traditional creamed butter/sugar, wet and dry ingredients


For the Cake:
9 tablespoons unsweetened coca powder
1½ cups cake flour (not self rising) 
½ teaspoon salt
1 teaspoon baking soda
1/4 teaspoon baking powder
4 ounces 1 stick unsalted butter, at room temperature
1½ cups granulated sugar
2 large eggs, at room temperature
½ cup strong coffee
½ cup whole or low fat milk


For the Ganache frosting:

10 ounces of bittersweet or semisweet chocolate, coarsely chopped
½ cup water or heavy cream ( I used water, as this cake is rich in itself)
3/4 cup 1½ sticks unsalted butter

1.Preheat oven to 185 degrees C-350 F
2.Butter 2  9"X 2" cake pans and line the bottoms with circles of baking paper¨
3.To make the cake layers, sift together the coca powder,cake flour salt,baking soda,and baking powder in a bowl.
4.In the bowl of a standing electric mixer or by hand, beat together the butter and the sugar about 5 minuted until smooth and creamy. Add the eggs one at a time until fully incorporated.I used my hand mixer.) Remember to scrape down the sides of your bowl as you mix.
vintage pyrex* from my mom
5.Mix together the milk and the coffee. Stir half of the dry into the the butter mixture, then add the coffee and milk. Finally stir in the other half of the dry ingredients.

6. Divide the batter into your prepared cake pans, and bake for 30 minutes, or until a toothpick inserted into the center comes out clean. One cake was done quicker than the other, so keep an eye on it.Cool completely before frosting.

water bath
7.To make the frosting, melt the chopped chocolate with the water stirring occasionally until melted.Remove the bowl from the pan of water.

8. Cut the butter into small pieces and whisk them into chocolate until they are completely melted and the ganache is smooth. Cool until spreadable, which might take up to an hour at room temperature. I let it rest for an hour than popped it into the fridge for 10 minutes and it was ready to use.

9. To frost the cake:
Run a knife around the inside of  each the cakes which will help release them from the pans. Carefully lay them onto a cooling rack and remove the baking paper. Once completely cooled you can invert one cake onto your
chosen platter and begin to spread your frosting over the entire top of cake. Making sure you save enough to fully cover your cake as a whole. Place the second cake on top of the frosted bottom and continue to ice as you desire. Let rest for a few minutes or you can place it into the fridge but remove at least 30 minutes before you want to serve. We ate it just as it was. fresh, still a little warm, but oh so perfect. 
The second best thing was sharing it with Anette and her family, friends for her 40th birthday!
Happy birthday Anette!!


Monday, March 14, 2011

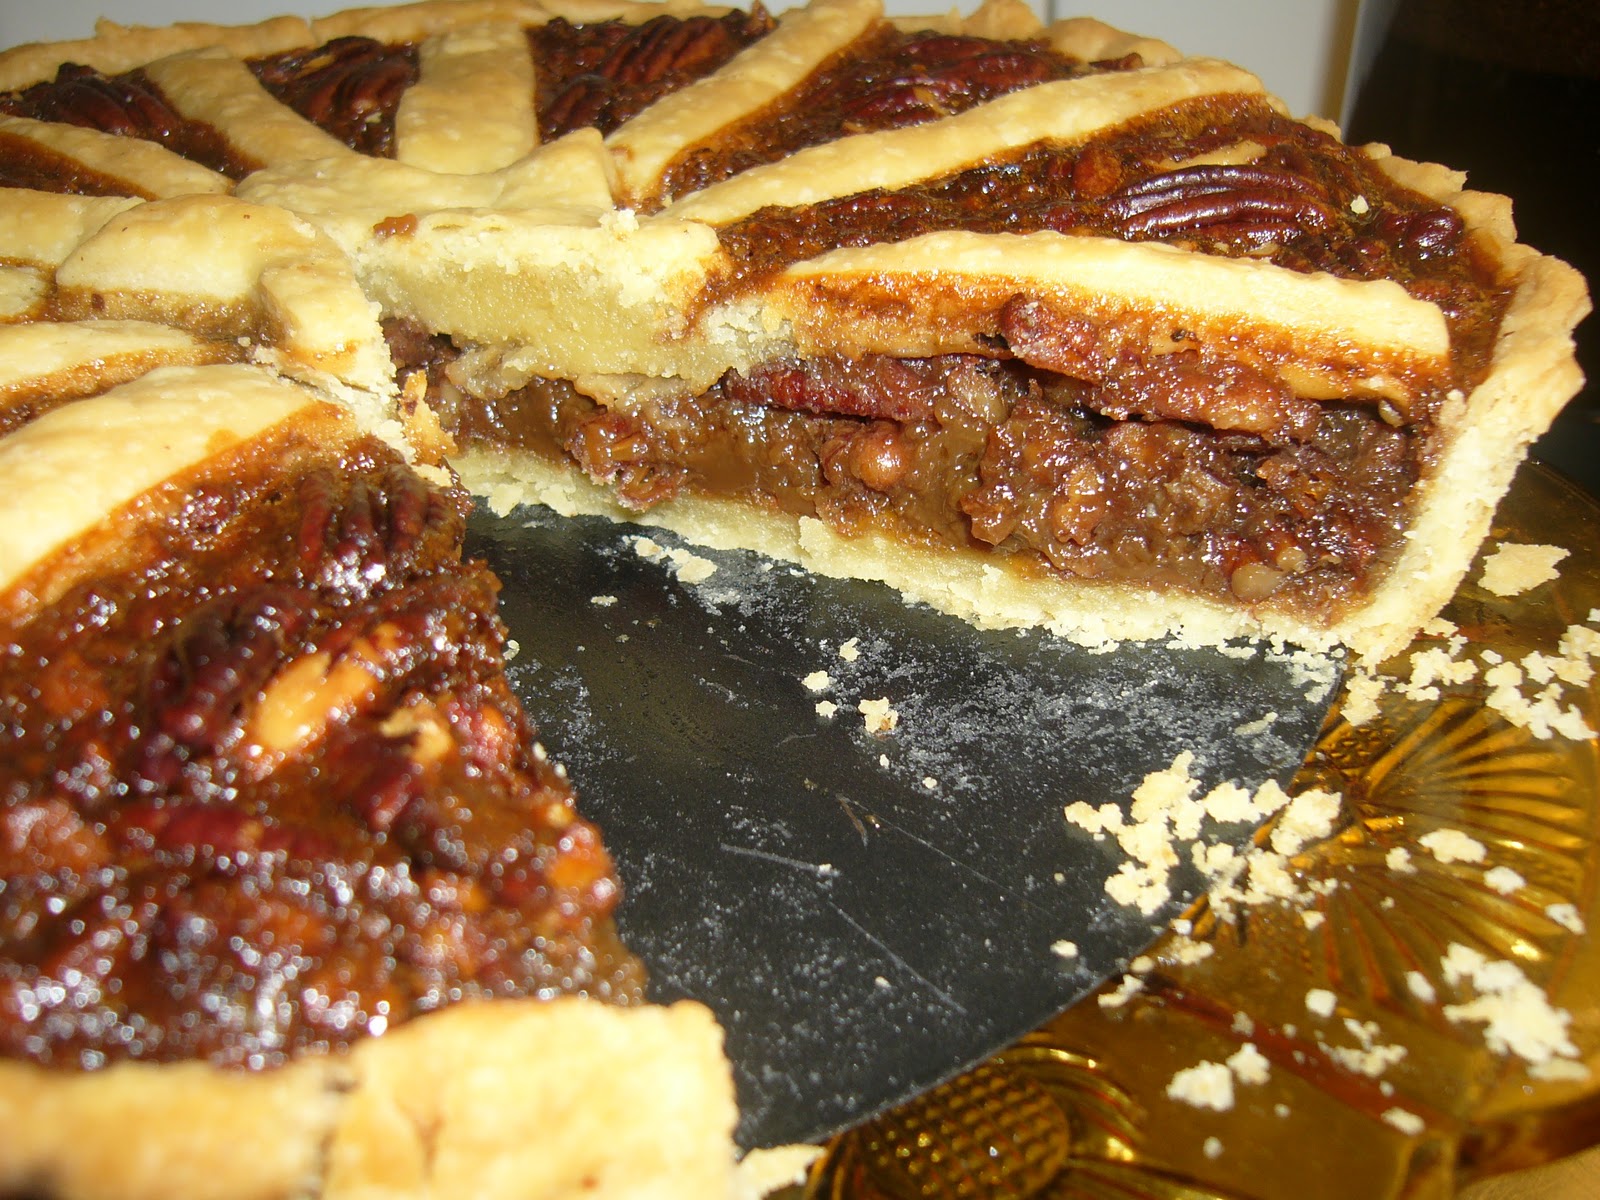
Four Lost Souls Amaretto Pecan Pie

shine bright 
Lately it seems that pretty much everyone I know is dealing with a death of someone dearly. It has been a long, cold and icy winter, and now mother nature has claimed three now four(as of yesterday) lovely souls. We live in a very tiny community of only 1900 inhabitants, but this tragic loss has reached further than our little village. I am so great full to announce that there was on life saved and we wish her a speedy recovery, and us her little community will be there to help hold her up and to hold the hands and wipe the tears of those who lost a loved one on that icy night.

Perhaps they are not the stars, but rather openings in heaven where the love of our lost ones pours through and shines down upon us to let us know they are happy. -Author Unknown.


I am one of those people who needs to be in the kitchen when tragic events happen. It is my solace and my forgiver. I hope that perhaps there are other's out there that feel the same, and maybe this recipe will drive away or give you some sort of peace. I know it made me feel better.
Let's start with the pie crust. It is my favorite part to eat, and it is the foundation to any great pie. I really like pie crusts made with butter, instead of shortening or margarine. I think it gives a flavor and the crumb it develops is so flaky and it bakes wonderfully. Here is my all time favorite pie crust recipe.

How to basic pie crust.(Enough for two single filled pies or one covered pie)

2 1/2 cups all-purpose flour, plus additional for rolling
1 1/4 teaspoons kosher salt
250 grams unsalted butter, cut into pieces and chilled.
about 3-5 tablespoons of ice cold water

The secret to a great pie crust that bakes into a wonderfully flaky, crispy crust. Is not to over work the dough. It is not difficult to make an amazing dough, just be aware that the more you "man handle" the mixture the tougher the dough will be. I always use my mix master and add the flour and salt blitz or a second then add the butter and blitz until it starts to form a pea like dough. Usually just a few seconds then add the water tablespoon by tablespoon until it reaches a ball like stage, but not over sticky, but just easy enough to remove to my counter. You can always do it by hand with a couple of forks or with a pastry blender. It literally takes 2-4 minutes and it is ready to be flattened into disks and wrapped in plastic and set into a cold fridge for 1 hour to rest.
If doing it by hand combine the flour and salt in a large bowl, then add the butter and combine gently. With your hands or a pastry blender, work the butter into the flour. Tossing and incorporating any loose pieces. Do this until the butter pieces are no longer bigger than a pea. Drizzle the water a tablespoon at a time until the dough just holds together when pinched.Add more water if your dough seems dry. Work in, but do not over knead it. Divide the dough into two half's one bigger than the other. The bigger one will be for the bottom.( I used the other half to decorate the top of my pie.)
mmmm...pie...
Let it rest in the fridge for 1 hour before use. If it is too hard to roll let it rest on the counter for 15 minutes at room temperature . Lightly flour your work space and and rolling pin.Lightly flour your disk of dough and roll out until 1/8 thick and roll up your dough around your rolling pin and roll over your pie plate. Makes it much easier to handle. Return to the fridge for 15 minutes to let the gluten rest. If you omit this stage your dough will shrink when baking.

rice, dried beans work well here.
When making a "open face" pie like pecan. You need to pre-bake your pie crust for at least 10-15 minutes at 180 degrees C. I have just ordered my new baking weights and they have not arrived yet, so I used rice instead( See photo.) Just line it with tin foil or baking paper first. Remove when it is looking a little golden brown, and gently remove the tin foil and rice.


How to Pecan Filling: 
:Pre heat your oven 180 degrees C 
1 cup dark brown sugar
2/3 cups golden syrup
1 tablespoon of *DISARONNO Italian Amaretto Liqueur or traditional rum or a dash more!
4 tablespoons butter
blending eggs, cream into syrup
3 large eggs
1/4 cup heavy cream
2 cups of pecans chopped ( I leave a few un- chopped to decorate the top).

Roast your pecans on a baking tray for 5 minutes at 180 degrees C. Remove from oven and let cool. Chop and set to the side.
the good stuff. :)
Next, in a large pan add the sugar and syrup Amaretto/rum,butter on high heat and stirring constantly bringing to a boil. Remove from heat and let cool until tepid. In a new bowl, whisk eggs. When the boiled syrup has cooled beat in the eggs, salt and cream.

I like to stain the mixture in-case of any extra egg parts
Add your chopped up roasted pecans to the bottom of your pre-baked pie shell and pour over your tepid syrup/egg mixture.I choose to decorate this particular pie for the the three new stars in the sky, but traditionally this pie is enough without any topping. Add to your preheated oven and bake for 45 minutes or until the middle is not springing back to much to the touch. Should have a firm top, but not jiggly. Let cool completely, before serving. Even better the next day. Serve with whipped cream, ice cream or it is fine just on it's own.

Star bright
star light
E. we are praying for a speedy recovery.
the first star I see tonight.......

Savory Donut with Black Caviar, Nordic Fresh Shrimps,Sour Cream, Red Onion and Grated Cheddar ..

For my Goat. I heart you too:)
Wow, so here is what I did with my left over donut dough. I made Lango's a.k.a. Hungarian fried bread. They are served at  most street fairs and carnivals around Sweden. I love the fact that we live on the west coast and have some of the worlds best seafood and fish at our finger tips. I know I scored extra brownie points for this on the next mother's day. It really could not be any easier.( if you save some dough) I opted to splurge and buy the already hand pealed shrimp instead of getting them from the fish mongers and pealing them myself. I know how dare I.(That was for David Lebovitz) I removed the !

You can use any combination for your topping and we love the combination of sour cream with black caviar,red onion,fresh shrimp and grated cheese. I tell you, it is a combo that just  melts in your mouth. Some might think that the black caviar and shrimp would be to much"fishy" tasting for you, but really. It is fresh, light and you just keep licking it up.

You can make a traditional lango's dough by following this link http://www.netcooks.com/recipes/Sandwiches/Hungarian.Langos.html
Or you can first make the donuts and then treat yourself to a Lango's after all that hard work.
fry my little one..fry..
Here are a few other fillings that you might find enjoyable.Sour cream/ creme fraiche (are a must), chopped or diced hams, turkey breast, salami and brei cheese, oh there are so many possibilities! Diced onions of any color, green onions, Charlotte, red, silver, yellow. Freshly grated cheese of all kinds. Be inventive have fun, and fry your little heart out. Maybe you can score some brownie points too.Happy eating my friends.

Friday, March 11, 2011

I HEART DONUTS for Karen Q.

This what I do on a rainy, snowy Swedish day...
The second degree burn on my thumb, was so worth these babies. I am a proud blog mamma today. I have fond memories from my childhood making donuts with my brother and sisters at our restaurant in Youngstown. I loved when my mom would make us "dough boys" which are pizza dough fried in fat then sprinkled with sugar. Okay, maybe some of you out there are shaking your head, but really donuts are basically a sweet bread dough that is either baked(really).. or fried in fat. Crispy creamers look away now, as I fried my little golden nuggets in coconut oil..


I have a bad habit of over doing it in the selection or sort of donuts. I must do them all. Go hog or go home is my motto, so here it is ladies and gents.My black cherry jam filled donuts,creme patissiere filled, cinnamon sugar, plain, couverture*( couverture chocolate is available from speciality food stores and on the web.Dark chocholate is perferred for cooking. Milk couverture chocolate is available, but can be subsituted with good-quality eating chocolate.I buy mine at www.mumsigt.se Toppings included sprinkles and white couverture chocolate.


homer would be proud....
Put on your jogging pance , because we are going on a calorie induced ride. Enjoy, be careful, and let's all agree to HEART DONUTS:)


4 teaspoons active dry yeast
1/4 cup lukewarm water
1 cup lukewarm milk
3 tablespoons sugar
100g melted butter
4/1/4 cups flour plus more if dough is sticky just keep adding by 1/4 cups until you get the right consistency
100% coconut fat...best for frying
3 eggs
vegetable oil or coconut fat, shortening, lard(if you must!)


Place yeast, water,milk and 1 tablespoon of the sugar in a bowl and set aside for 10 minutes.
the mixture will start to foam,indicating that the yeast is active.Add the butter,flour,eggs and remaining sugar to the yeast mixture and mix with your hands or a wooden spoon until a sticky dough forms. Bring the dough together on your lightly floured work surface and start kneading until you get a nice silky dough and this can take a few minutes. I had to continue to add a little bit of flour as I was kneading as my dough was still quite sticky.


Place the dough in an oiled bowl, and let rise in double around 45 minutes to an hour.  I always set it on top of my stove with the oven on at 50 degrees C to help proof it a little. Remember yeast likes a warm place, so do not set it by a drafty window. When finished rising, pour your dough onto your lightly floured work surface and roll out to as big square or rectangle until 1 cm thick. Cut using a donut cutter or an old round cookie cutter or even a regular old drinking glass works well. 
Place your donuts on a baking paper lined baking tray and cover with a clean tea towel and let rise in a warm place for 30 minutes. 
NOTE: Do not double this recipe, unless you have help.....It makes so many donuts, and by time you have cut them out the ones rising have over risen, so stick to a one batch at a time.
You can re-use the extra bits. Just knead them together and cut out more. Be inventive and use all kinds of cookie cutters, your kids will love a dinosaur donut. Wouldn't you??:)


While your donuts are rising the last time. Place your frying fat in a good heavy deep 3 liter pot and set on medium low heat. Coconut fat can reach an extremely high temperature, so be very CAREFUL, the splash back can result in some very serious burns..hint..hint...:( Also be careful of heating oil on the stove, you should always have the lid to the pan close by and a long oven mit that can help you safely put out any fires that over heated oil can cause. Please go out and buy yourself either a good thermometer or a deep dry machine. It's much better to be safe. Watch the oil like a hawk, and turn down the heat if you think it's getting to hot.


drooling yet?
Using your slotted spoon made of metal...Gently add a few donuts at a time and cook in batches. These little guys cooked up within a minute or so, flip them over when they are nice and lightly golden and then drain them on a large baking tray lined with lots of sheets of paper towel. If you want to have cinnamon sugar donuts once they have been drained on paper for a minute.Toss them into your cinnamon and sugar mixture.
1 cup caster superfine sugar to 2 tablespoons of cinnamon stir until combined. If your going to fill them or coat them in chocolate, caramel, honey glaze, then you can let them cool completely and finish cooking up the rest of 
them. 


Creme patissiere
Cinnamon sugar ( timmies eat your heart out:)
adapted from Donna Hay's Modern Classics 2
To make filled donuts, omit the the holes and fill a piping bag with which ever filling you want, and pierce a little hole big enough to fill your piping tip. Have fun, enjoy, and wow your guests.


Tuesday, March 8, 2011

Stuffed Focaccia with chorizio, plum tomatoes and onions

Stuffed Focaccia with Chorizio,plum tomatoes, onions and Gruyère cheese 
Okay you guys must think that I just spend days in my kitchen slaving away to post you all these goodies. Well, your right. I couldn't wish to be any where else on my free time than in my kitchen cooking and baking my little heart and wallet out. I know another posting for chorizio sausage, but hear me out. It is nearly impossible to find any good quality Italian sausage or any meat like sausages in my local shop or any near by, and I didn't have the time to take a trip to Göteborg to the Salu Halle  to find a real sausage, so hence here is chorizio again.....Which in this recipe so made my mouth thank me.


I love bread, all kinds of bread, hard breads, white breads, danish breads, swedish breads, amish bread, etc, etc.....Then I came across this beauty onwww.theitaliandishblog.com and I knew I had to try it out. This is the best and easiest wow bread to make. I adapted it quite a bit to use what I had on hand and it came out so smoking delicious, I think this is a sure keeper for the days of beer swiggin' on the balcony this summer.


The Italian dish used turkey sausage and one large onion, Parmesan cheese, habanero pepper, and oregano, but I took it a few steps farther and added some all time goodies of mine. Fresh baby plum tomatoes, red, yellow and spring onions, Gruyère cheese and dry chili flakes.
It is a fun way to make a hardy bread sandwich for the coldest months or to take on a picnic or out ice fishing. I am sure if you tried it you would be amazed at the simplicity of this recipe. Go forth my bread foodies and bake one for your nearest and dearest!


Serves  6-8
Preheat oven at 175 degrees C
You will need a 9'' inch spring form pan for this recipe.


how to sponge:
1/2 cups of warm water(not hot)
sponge
1/2 teaspoon instant yeast fast acting rapid rise( I skipped this part, and used a traditional fresh sweet based fast acting 50g fresh yeast cube)
3/4 cup all purpose unbleached flour


how to dough:
1 teaspoon instant yeast( I skipped this part and just went with the 50g all in the sponge)
1 cup water
silky second rising dough
3 tablespoons olive oil I used extra virgin
ADD THE SPONGE ABOVE
3.25 cups of unbleached all purpose flour  approximately)
2 teaspoons sea salt


how to stuffing:
2 tablespoons olive oil
500g-1 pound sausage 
2 medium yellow onion
1 small red onion
2 stalks of green onions or spring onions or salad onions
1 1/2 teaspoons of dried chili flakes or any fresh chili of your choice
1 teaspoon coarse sea salt, kosher salt,freshly ground black pepper
3 cloves garlic minced or grated
1/2 cup freshly chopped parsley
1/2 cup freshly grated Gruyère cheese
six-8 small fresh plum tomatoes sliced length ways


how to topping: 
2 tablespoons extra virgin olive oil
1 teaspoons coarse sea salt, black pepper, chili flakes, oregano, or any kind of spices you like.


To make the sponge:
sprinkle the yeast over the warm water in a large bread making bowl and stir in the flour.Cover with plastic wrap and let rise in a warm place until doubled and bubbly about 45 minutes.


To make the dough:
Add the rest of the yeast if using dried and not fresh. I added  all yeast in at the sponge part, so I skipped this part and added in the water, olive oil and then added about 2.5 cups of flour and worked with my hands a wooden spoon.The original recipe uses a Kitchen aid bread hook but, we are all about getting our grove on with hands on bread making in this house!
Knead in your bowl until a somewhat sticky but somewhat formed dough. Roll out onto the counter and add the rest of the flour or as much as you will need to make a silky springy dough.( You know when it is springy when to poke at it gently and it releases it's poke back to it's original form). Knead for a good 5-7 minutes. It's great relaxation!


Return to a clean large bread rising type bowl and coat with a few teaspoons of olive oil and roll the dough around to keep from drying out. Cover again with plastic wrap and put in a warm place a top the preheating oven is a great place to let rise until double again.About 30-45 minutes.Make sure the plastic wrap is not tightly clinging over the edges to allow the dough to rise.


how to stuffing:


remember to strain off that fat!
I removed the casings from my sausage and crumbled them into nice bite size pieces.Slice all your onions and garlic. Grate your cheese, chop your parsley and set a side.Take the olive oil and heat up in a frying pan and fry up your sausage. Remove the meat with a slotted spoon and dis guard  the fat( there will be lots!)BUT:: do not wipe out the frying pan. Add the olive oil, onions,garlic and cook until they are nicely wilted but not browned or burnt. Add back the precooked sausage and mix in the chili flakes and a little salt and pepper. Take off the heat and pour into a bowl and add your chopped parsley and grated cheese. Let  sit on the counter room temp until bread is finished rising.
yummo
baby plum tomatoes!


how to third rise:
the bottom before the stuffing added
Adding the top, and hello giant hand..:(
After the second rise and you have punched down the dough and oiled your spring form pan. Divide the dough into two equal parts. Flatten the first part into a disk that resembles roughly the size of your spring form pan.Form the dough with your hand to flatten but not torture the dough into the pan. Now spoon the filling onto the top of dough.Add the sliced baby plum tomatoes and add repeat the procedure with the top portion of the second half of the dough.Cover with a clean tea towel and let raise again for 30 minutes. When it is finished rising gently dimple the top of the dough with your fingers. drizzle a little olive oil over the top and add all the chili flakes, oregano, basil any type of dry herbs you would like. Add a little sea salt and lots of black pepper. 


oh so so so so goooddd......
Bake for 35-40 minutes until the top in golden brown and sounds hollow. Let sit for a few minutes or an hour then undo the pan and serve in slices. So beautiful this is! You can reheat this in an 175 degree C oven for 15 minutes. Please try and share with your foodie friends and family. 

Monday, March 7, 2011

Brown Butter Butternut Squash Spice Cake

A little spice to light up your taste buds!
If your a real foodie, then food blogs like www.101cookbooks.com is the place to start. I am always spending time daydreaming of new and exciting healthy food for the goat and lilla a. I came across 101 cookbooks a few years ago, and it was like a breath of fresh air. It was so cleverly planned, well researched, and I could some what identify with the author Heidi Swanson's love of usual and quirky recipes and natural ingredients.

aw, butternut squash don't be afraid!
I never thought that I would be the author of my own food blog, but I am grateful to my very blog minded buddy Stacey www.toquegirlworld.blogspot.com for helping me reach one of my goals. Oh, I realize I am not the best writer, nor are my recipes anything special, but for me to have somewhat of an audience experiencing  my love of food is all I can ask for. So, for you few faithful readers, please keep on following me, and thank you for giving my dream a voice.This one's for you.

Adapted from 101 cookbooks brown spice cake


puree  after roasting
1/2 cups of unsalted butter
1/2 cups whole wheat flour
 plus 1 tablespoon each of butter and flour for the pan
1 teaspoon baking soda
3/4 teaspoon cinnamon (mill&mortor as well)
1 teaspoon Gram Masala curry ( I used Kandyan curry medium spice from the fusion spice blends from www.millmortor.com
1/2 teaspoon ground cardamom
1/2 teaspoon fine grain sea salt
1 cup fine muscovado sugar( plus another 1/2 tablespoons for topping)
2 large eggs
1/2 cup well-pureed roasted butternut squash
1/4 cup milk
1/2 cup lightly toasted hazelnuts( I used hazelnuts because that is what I had on hand. The original recipe from 101 cookbooks uses almonds)

Puree: How to roast a butternut squash: Tip and top the gourd and cut lengths width. Scrape out the seeds, and slice in sections or quarters and place on a baking tray. I left the skins on, and peeled them off after roasting at 200 degrees C for 30 minutes.No need to season, butternut squash is sweet and lovely on it's own. Add to a bowl deep enough for your emulsifier and puree until nice and smooth. Set aside.

Brown butter method:
While your butternut squash is roasting. Add your butter to a small pot over medium heat. Watch it, you do not want it to scorch. I used salted butter, because that is what I had on hand. Let cook for around 25-20 minutes and clear away the excess foam if you desire. You know your butter has browned when you can smell this beautiful nuttiness from it, and the milk solids are the darkish bits on the bottom. Take off the heat and let cool, but not HARDEN!! If your in a hurry and you need to get this cake into the oven, you can skip this stage and just add the melted butter, but you loose a ton of flavor.
Adding the brown butter to the wet ingredients 

browned butter before I spooned off the foam. 
Now, wow you must be shaking your head, so many little things to do, for just one cake. I promise you it is so yummy, you will be adding this to your favorite cake recipes.Okay, now where are we? Oh, yes, the next step.....

adding wet to dry...cool
take a large bowl, and sift your  dry ingredients flour, baking soda, curry powder,salt, cinnamon,cardamom  set aside.In another bowl add your muscovado sugar and whisk together with the eggs. Add your butternut squash puree,milk and the cooled butter. As in most cake recipes you then add the wet to the dry mixture only stirring until incorporated.

This recipe calls for you to use a loaf pan, but I have a great selection off vintage baking tins collected from church secondhand  stores, and I thought it would be great in a bunt cake pan.You need  to take the extra butter and flour and dredge the pan in the butter and then flour it with the extra flour to prevent the cake from sticking, and if your a beginner baker, I would stick to a loaf pan, as a bunt cake pan can be a little unforgiving around the flute. Set aside. I roasted my hazelnuts in a frying pan over medium heat until they were a starting to get some color and I could smell the oils being released.( I always take hazelnuts in a plastic sandwich bag and beat them with a meat clever until I am satisfied with the ratio of smashed cracked and halved nuts.)
right out of the oven!
After they have been roasted I stir in half the amount into the batter and pour the batter into the prepared cake pan, and top the cake with the remaining nuts and left over muscovado sugar. Tap a few times on the counter to release any air bubbles and set in an preheated oven at 180 degrees c. The original recipe says to bake for 50 minutes, but this is a cake you do not want to over bake. I check it around 35 minutes and if your toothpick or skewer comes out clean remove from the oven. I always know that my cakes are finished when you can start to smell them baking. Let sit in the cake pan for 15-25 minutes then gently remove from the pan.
Serve with a good spicy cup of chai tea or a nice cup of hot strong coffee. Delicious!

Tuesday, March 1, 2011

Chorizo Pytt i Panna with Picked Beets and Egg Swedish style

Served with pickled red beets and a fried egg. Comfort, pure comfort
fry up your onions
It is what Swede's call Husmanskost or in english, potluck. It is the grandma on the farm recipes that cross most Swedish tables everyday. These recipes can be found at most eateries even the big fancy pancy ones located around the Stockholm and Göteborg. They are the same as "grandma's" just served up on fancy plates and charged double of what you would get if you went to a local cafe or lunch bar.

add in the potatoes 
Add  the sausage to your fried onions
These recipes are passed down from generation to generation. Our children learn to eat them in their daycares, and they serve up a mean plate of Blood pudding at school as well.(ICK) but it's tradition, and who am I to knock tradition? Let's take one of my favorite husmankost  for instance. Pytt i Panna. A pytt is a bit and panna is a frying pan. Add it all together and we get hash. Nothing new here, just way better executed then the heavy greasy hash most diner's are serving up else where.The key to good swedish pytt i panna is precooking your spuds and letting them cool completely before cooking. I always try to plan ahead to make sure I have day old boiled un pealed  potatoes for this very reason. A couple of yellow onions and the best quality chorizo sausage I can get. I really like( Gourmett Kött brand available at ICA in the sausage department) Good quality at around 90% whole meat that's a real sausage. No bum and antlers in this quality sausage! Traditional pytt i panna is made with leftover meat sausages, pot roast, even fish, chicken works well here too. Just remember that you want to cut everything in the same size smaller the better so it all cooks evenly. I always like to cook everything separately, it adds a little more time to the meal, but it is more fun that way!!
Here is my recipe for 2 hungry people or 3 light meals.
6-8 pre- cooked day old boiled potatoes pealed and diced
2 large yellow onions pealed and sliced
3 large chorizio sausage or as much meat to potato ratio you want
2 tablespoons of butter
a tablespoon of vegetable oil
salt and pepper¨
a pinch pf paprika
garlic powder a dash hear and there..
First of all it is essential that you have a good frying pan that has a non stick surface, as this will help you to cut down the amount of fat you will need to help you fry this meal up. I always peal my potatoes first and chop them up in to little cubes the size of a traditional store bought hash potato would be like, or a nice dice. I follow the same with the meat and the onions. I always fry up my onions first on medium high heat, making sure not to over brown them or burn them. Then I add in the sausage and lastly the potatoes I like to add the seasonings here, salt and pepper and a pinch of paprika is great. Remember to taste, taste, taste. There is nothing worse than a tasteless potato . 


Fry up over medium heat stirring and tossing often and adding a little more oil or butter as you go to help prevent sticking. I like to preheat my oven to 200 degrees C and pour the pre cooked pytt into an oven sheet and let the oven do all the work. It needs to be watched and tossed a few times and heat lowered to 180 degrees C for 20 minutes then fry myself up a nice sunny side up egg. Plate up top the pytt with my egg and add a heaping tablespoon of pickled red beet slices. Just amazing. A real good easy to make dinner straight from my Swedish kitchen to yours.

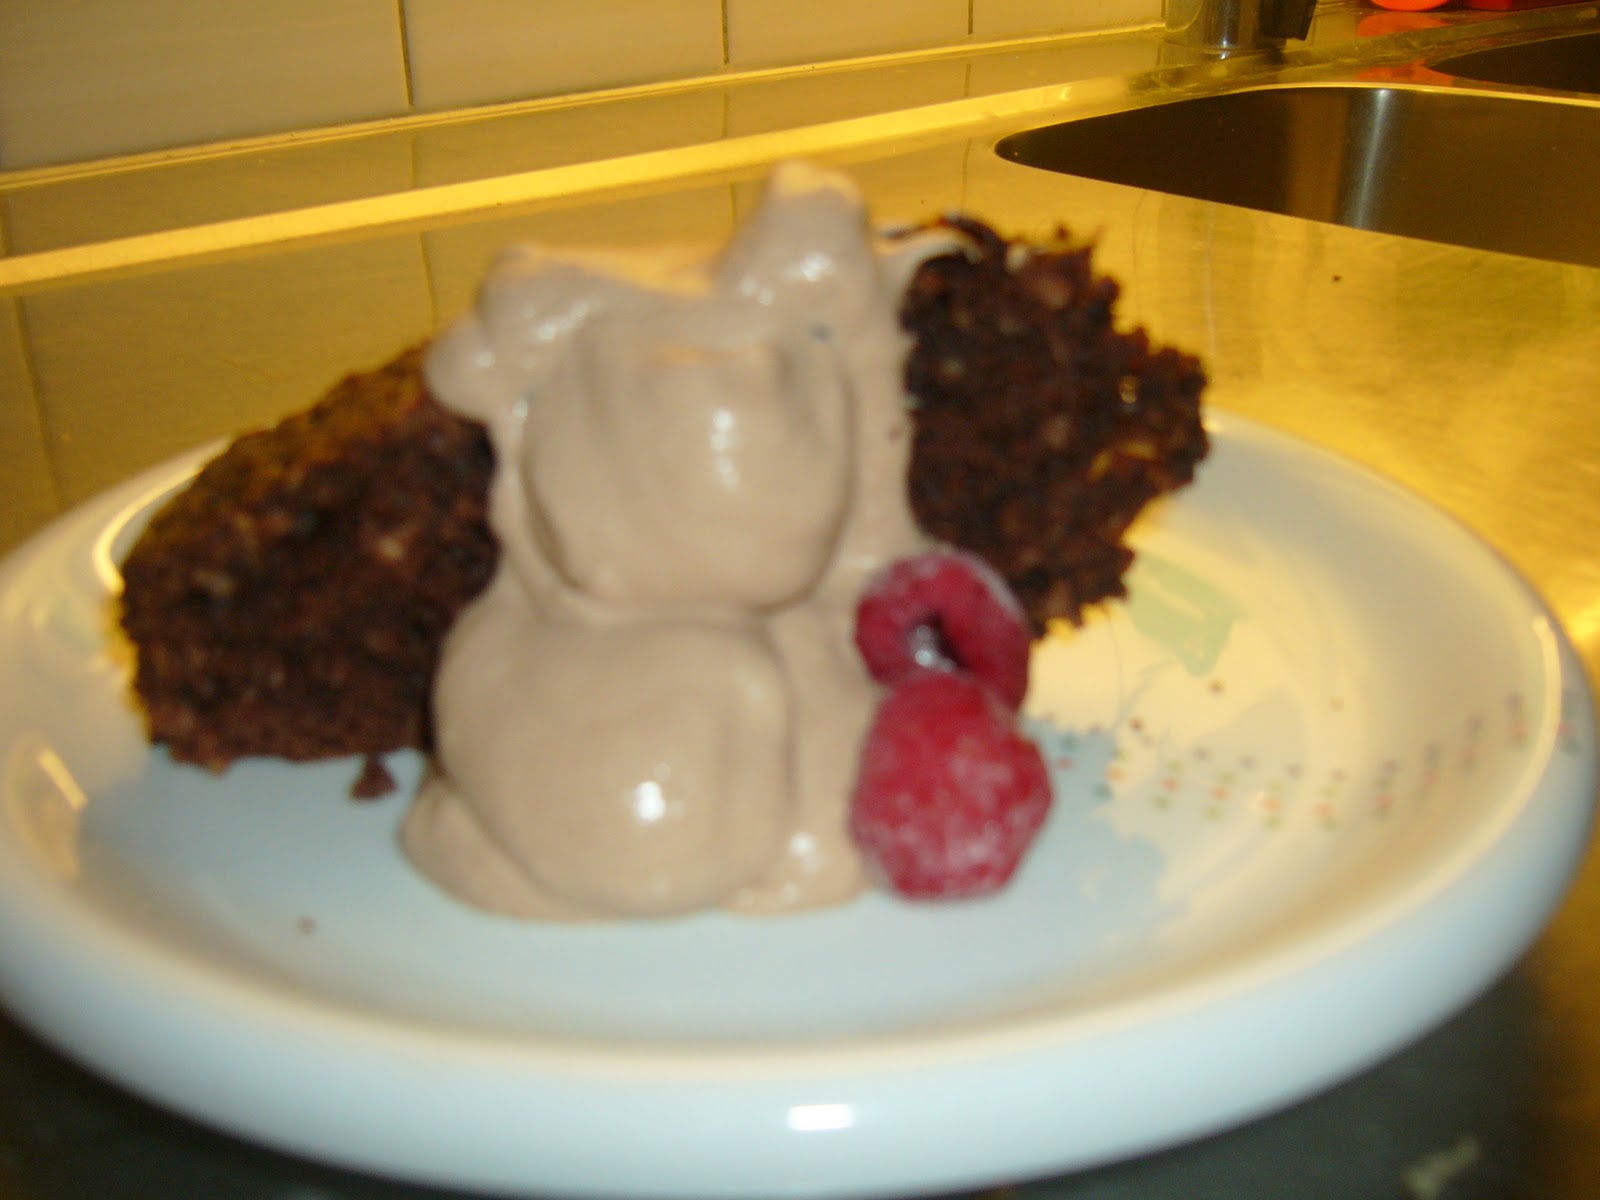
Modern classics melt-and-mix chocolate coconut cake for Jenny

Chocolate whipped cream with frozen raspberries need I say more?
Thanks in part to Donna Hay, Modern Classics Book 2
Where did I find the time to work a full day and come home unload the dishwasher, hang a load of laundry, bake a cake, make a full coarse dinner and dishes and watch the OSCARS and still get myself to bed at 1 am??  It is because when you have great inspiration, you can bake just about anything. I swear to you this cake is a great comfort food, with an even better lasting impression. It is a one bowl wonder and it literally takes any baker 10 minutes to whip up and 35-40 minutes to bake. Can we say really, that easy. Yes in deed. This one is for Jenny, AK little sister and a foodie by heart. Enjoy.P.S Jenny when can I come and cook in your kitchen?? Krams.
Preheat the oven to 180 degrees C (350 degrees F). 
Directions: made easy
Place 250g (8 oz) melted butter, 3/4 cup sifted cocoa powder, 1 1/3 cups of sifted caster sugar(superfine) ie:  make your own superfine caster sugar just add it to your mix master and pulse for a few seconds. 3 eggs, 1 1/2 cups desiccated coconut(everyday baking coconut) 1 1/2 cups plain (all purpose) flour,1 1/2 teaspoons baking powder and 3/4 cup (6 fl oz) milk in a bowl and whisk until smooth. Pour into a greased 24cm (91/2 in) round cake tin( I used a spring form pan) lined with non stick baking paper and bake for 50 minutes. This where I think the recipe needs to be changed. I baked it for 40 minutes and tested it and I think it was a little over baked for my taste. I wanted a more gooey cake, so if you want a cake with a little more gooey parts then bake it for just 30-35 minutes, but watch it!! You can dust it with cocoa and serve warm or cold with thick double cream. I used homemade chocolate whipped cream!